Shopify Ad Tracking: A 2026 Setup Guide for Meta, Google, and TikTok
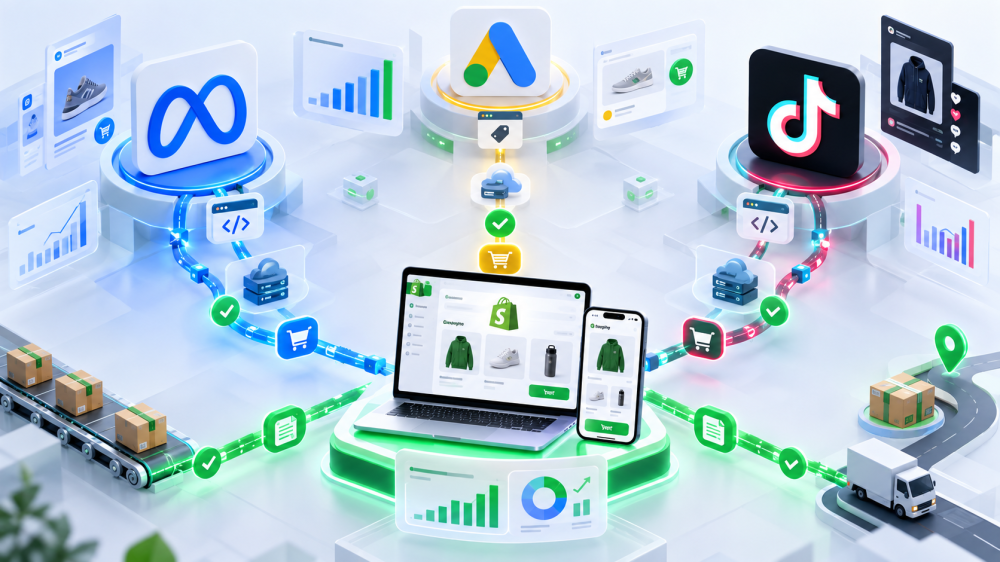
This is a guide to Shopify tracking for ads: getting Meta, Google, and TikTok to receive every purchase your store records, with enough identity attached to credit the right ad. (If you’re looking for order or shipment tracking, that’s a different Shopify feature.)
The setup changed more in 2026 than in the previous three years combined, so this is written for the store as it exists today: checkout extensibility everywhere, Additional Scripts gone, App Pixels defaulting to Optimized, and every platform leaning on server-side data. Work through it top to bottom. It takes an afternoon.
Before you start: four things every platform depends on
Every ad platform on Shopify now runs through the same plumbing, so get the plumbing right first.
- Know where pixels live. Since checkout extensibility, all tracking on Shopify runs through Customer Events (Settings, then Customer events). App pixels are installed by sales channel apps; custom pixels are added by a developer. Both are managed there and both run in a sandbox with access to the full stream of store events including checkout, per Shopify’s pixels documentation. Nothing else runs on checkout anymore.
- Remove legacy code. The Additional Scripts field stopped executing for non-Plus stores on August 26, 2026. Anything still pasted in theme.liquid or an old app is either dead or double-firing. Find it and delete it. Our post on the deadline has the audit steps.
- Set customer privacy deliberately. Settings, then Customer privacy. In the EEA and UK, pixels run only after the visitor grants the permissions the pixel requires. Decide which regions require consent and which don’t, and know that every platform’s numbers will be lower where consent is required.
- Build a UTM template. Shopify’s own attribution reads the landing URL. Every ad on every platform should carry utm_source, utm_medium, utm_campaign, and ideally the ad ID. Pick a naming convention and use it everywhere before you launch a single campaign.
Meta ads tracking on Shopify
Meta ads tracking runs through the Facebook and Instagram sales channel, which installs an app pixel under Customer Events and, at the right data-sharing level, a server-side Conversions API connection.
- Install the Facebook and Instagram channel from the Shopify App Store and connect your Business Manager, ad account, and pixel (now called a Dataset in Meta’s interface).
- Set data sharing to Enhanced or Maximum. Standard sends browser pixel data only. Enhanced and Maximum add the Conversions API, sending purchase events server to server with hashed name, email, phone, and location, per Shopify’s data-sharing documentation. Do not leave this on Standard.
- Confirm the pixel is Always on, not Optimized. Since January 13, 2026, Shopify’s Optimized default pauses an app pixel that shows no attribution signals for a stretch, as ALM Corp documented. Check the status in Customer Events and switch it if your plan allows.
- Place a test order. In Meta Events Manager, open Test Events. You should see one browser Purchase and one server Purchase with the same event ID, merged into a single deduplicated event, with email and phone in the customer information section.
- Check Event Match Quality after 48 hours. Purchase should be above 8. If it’s stuck at 6 or 7, the server side isn’t sending identifiers; go back to step 2.

Google ads tracking on Shopify
Google ads tracking runs through the Google and YouTube sales channel, which installs the Google tag, creates conversion actions, and can send enhanced conversions. Google’s own setup guide lists five steps; the ones that matter are below.
- Install the Google and YouTube channel and connect your Google account. Then link the Google Ads account. You can skip the Ads link and use conversion IDs instead, but the linked path is simpler and less error-prone.
- Accept the suggested conversion actions. The app proposes purchase, add to cart, and checkout started, mapped to Shopify events. Take them. Do not also build a manual Purchase action in Google Ads; two Purchase actions from two sources means double counting.
- Turn on enhanced conversions. It is not enabled automatically. Switch it on during setup or afterward under the app’s settings, and accept the customer data terms in Google Ads when prompted.
- Set Purchase as primary. In Google Ads, Goals, then Conversions. Purchase is primary and used for bidding. Add to cart and checkout started are secondary, observation only.
- Verify in Diagnostics. Goals, then Conversions, then Diagnostics. The tag status should be recording conversions and the enhanced conversions rating should read Good. Fair or Poor usually means consent is blocking the ad_user_data signal.
TikTok ads tracking on Shopify
TikTok ads tracking runs through the TikTok sales channel, which creates a pixel and offers the same three data-sharing tiers as Meta. Its server-side coverage is the least reliable of the three, so verification matters more here.
- Install the TikTok channel, connect your TikTok for Business account, and link Ads Manager. The app generates a pixel or lets you select an existing one, per AdNabu’s 2026 walkthrough.
- Set data sharing to Enhanced or Maximum under the app’s settings, same logic as Meta.
- Verify what actually arrives. Place a test order and open TikTok Events Manager. Confirm Complete Payment fires with value and currency. Then check whether a server-side copy arrived at all. Several 2026 setup guides report the native integration behaving as browser-only in practice, so don’t assume; look.
- If no server events arrive, add a dedicated Events API integration. A third-party app or server-side tag setup, with event_id set to the order number on both sides so TikTok deduplicates. Our server-side tracking overview covers the options.
Go-live QA: the checks that catch what setup missed
A tracking setup is done when the platform’s received events match your orders, not when the pixel helper turns green. Run these before you trust the numbers:
- One test order, three Events Managers. Each platform should show exactly one Purchase, deduplicated, with value, currency, and content IDs attached, and customer identifiers present on the server copy.
- No duplicate sources. In each Events Manager, list every source sending Purchase. One browser, one server. Anything else is legacy code you missed in the prerequisites.
- Seven-day received-events check. After a week, compare Shopify paid orders to each platform’s received Purchase count. They should be close. A platform sitting well below orders has a delivery problem. A platform sitting above orders has a deduplication problem.
- UTMs are landing. Open a few orders in Shopify and check the conversion summary shows the campaign and source. If orders from paid ads show as direct, the UTM template isn’t applied.
- Consent regions behave as intended. Test from an EU IP if you sell there. Pixels should wait for consent and fire after it.
Put the seven-day check on a monthly calendar. Every app install and platform update is a chance for something to regress silently. Our Q4 first-party data checklist is the pre-BFCM version of the same discipline.
What this setup gives you, and what it doesn’t
Done properly, this setup gets each platform the most complete view of your conversions it can have, with enough identity to match and enough parameters to optimize.
That improves delivery, which is real money.
It does not give you an independent number. Each platform still applies its own attribution window to the events it receives, credits itself for orders the others also claim, and reports a Purchase count that you cannot audit outside its own interface.
That is what a first-party, click-only attribution layer is for.
It captures the ad click ID when the shopper lands, follows the session on your own domain, and ties the Shopify order to the click that started it, from your order data. It doesn’t depend on a pixel firing, a data-sharing level, or a platform’s dedup logic, and it counts each order once because it starts from the order.
It won’t credit views or engagement, and it will undercount some upper-funnel influence. What it gives you is the number to hold every platform’s Purchase column against. Shopify’s data is accurate but isolated; the click record is what connects it to your ads.
Set up the plumbing once, verify it with a test order on each platform, and re-check monthly. Then keep a record of your own for the arguments the platforms will never settle. If you want to see your Shopify orders next to a click-only, first-party attribution record on your own store, book a live AdBeacon demo.
—-
FAQ
How do I set up ad tracking on Shopify in 2026?
Install each platform’s sales channel (Facebook and Instagram, Google and YouTube, TikTok), which places an app pixel under Customer Events. Set data sharing to Enhanced or Maximum for server-side events, remove any legacy scripts, configure customer privacy, and verify each platform with a test order.
Where are tracking pixels managed on Shopify now?
Under Settings, then Customer events. App pixels installed by sales channels and custom pixels added by developers both live there, and both run in a sandbox with access to checkout events.
Does the Google and YouTube app enable enhanced conversions automatically?
No. It installs the Google tag and creates conversion actions, but enhanced conversions must be turned on manually during setup or afterward in the app settings, and the customer data terms accepted in Google Ads.
Why is my Shopify pixel paused?
Since January 13, 2026, Shopify’s Optimized default pauses an app pixel that shows no attribution signals for a period. Check the pixel status in Customer Events and switch it to Always on if your plan allows.
Does Shopify’s TikTok app send server-side events?
The TikTok channel offers Enhanced and Maximum data-sharing tiers, but several 2026 guides report it behaving as browser-only in practice. Verify in TikTok Events Manager after a test order, and add a dedicated Events API integration if no server events arrive.